Have you ever had one of those projects that looked a certain way in your mind, but the final product looked… well not quite like that.. ? That’s how I’m feeling about this calendar.
I’ve been wanted to DIY a calendar so we had one that was a little cuter than the white dry erase board we were using. After searching the internet for various homemade calendar ideas, including the increasingly popular paint chip calendar, I still was lacking a vision for my project.
But, a trip to the Marshall’s clearance section ultimately hit me with inspiration! An glittery alphabet sticker set had gone on clearance for $1. I thought I would use the stickers as stencils for the days of the week, and spray paint over them onto glass from a picture frame. And for the background, I wanted to make it fun and shiny using the faux mercury glass technique I’ve been seeing on pinterest.
I bought a large glass frame from Salvation Army, and then purchased Krylon’s Looking Glass spray paint (specifically recommended for the fake mercury glass look), and a glossy black spray paint for the frame.
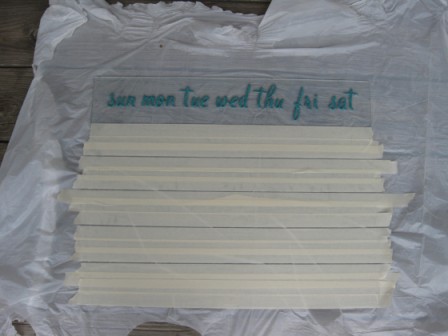
The first thing I did after washing off the glass was position the glitter sticker letters for the days of the week. Mr. Fancee helped with the alignment, if it weren’t for him I probably would’ve eyeballed it and it would’ve looked wonky… 🙂 And I taped off the horizontal lines for the calendar.
 For the black on the calendar I ended up using a chalkboard spray paint I had leftover from various projects. I thought the matte look would look nice next to the glass-y background and gloss frame.
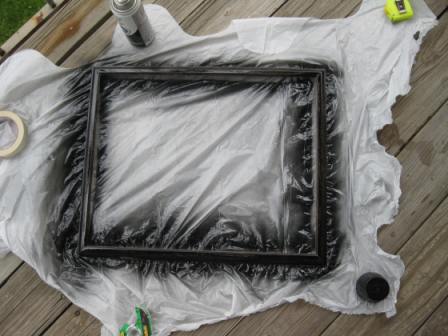
While I waited for the glass to dry, I decided to paint the wood frame with the glossy black spray paint…. The lazy way (Needless to say, Mr. Fancee was not there, if he was, it probably would’ve turned out better). I did not wash off the frame, sand, or prime it. And surprise, surprise the paint did not adhere very well… But I was obstinate and kept adding coats until it was completely covered. 🙂 One lesson learned!

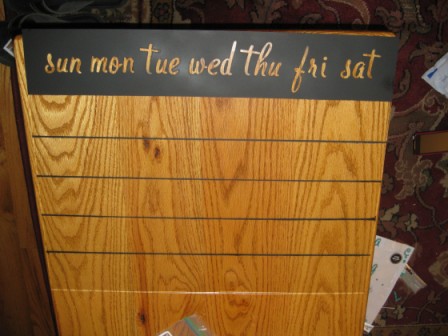
After the first coat dried, I taped off the vertical lines with more paint tape and made a stencil out of tape, tracing around two brackets that came with the glitter stickers. At this point I was very happy with my ‘vision.’ Part of me wishes I had just left it at this point… But, I began the faux mercury glass process.

I followed this tutorial, and did around 5 coats, spraying, dabbing and spraying.
 In the end, I liked the mercury glass effect. But, I think what makes it look so neat in vases and votives is when the light shines through and you can tell it’s slightly see through. I feel like, with the glass against the wall, it has a much darker effect and overall looks dirty maybe? Or difficult to see?

I may try and move it to an area that gets more natural light. But, for now it will work, and I do love the weekday lettering at least. Thoughts on the calendar?
Happy Monday!
Thanks for the ping back! Your project looks fabulous:)
April Moffatt